
Friday, December 19, 2008

2 Cuttlebug Border Cards


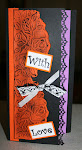
This border is one of my favourite ones. I don't like cutting the borders so they can be used in various positions on the cardstock so I have worked out a way to do this. Notice in the Oil Pastel card there is no sentiment above the middle flowers but there is on the plain cardstock. Patterned paper and this Oil Pastel design camouflages the cut I made above the flowers.

Sunday, November 16, 2008

Cuttlebug tags


A few more tags that have been bugging. Don't forget to use Kindy Glitz and or frinkles on them also.

Cuttlebug Tags

http://www.cropworks.blogspot.com/


A close up of some of the tags I have been bugging. These K and Co booklets I got from Cropworks. I love them but they have no texture that I adore. Just bug, ink and perhaps distress them and you have a new look.

Saturday, November 15, 2008

Cuttlebug border and tag


As you know I love using metallic cardstock with the Cuttlebug.It makes the embossing stand out and look elegant. In this card I slit a small section of the stem and inserted part of the K and Co tag into it. I have used Kaiser pearls that i love also on the card.

Friday, November 14, 2008

Cuttlebug Border using a die


This is a very simple card showing you one of the Cuttlebug dies I used to make this card with a double border. Not all cards have to be complex. Simplicity is often good. The patterned paper is Basic Grey.

Thursday, November 13, 2008

Cuttlebug die border-semi emboss


This card was done the same way as the previous one. I only indented the die and to make the mark on the cardstock.Then inked it to leave the pattern. The heart is part of the Disney series of double lots-one cuts and the other embosses.

Cuttlebug Border-Die


This card is using the Basic Grey Archaic sheet that is found in the packs. Why not use them on your cards??? It is economical and safe to use.This is the border die but instead of using the correct sandwich types to cut right through I decided to use less thickness and just indent the design into the cardstock. When i inked over it , it showed the colour of the cardstock that it was shaped from. So the dies have 2 uses:- 1. To cut out completely 2. To indent or semi-emboss. The shading is great also when you do it this way as it have different degrees of intensity.

Wednesday, November 12, 2008

Cuttlebug Borders x2


This card features both the borders from the same die that I spoke about previously. The lattice and the positive of the other border shown in the previous card.The patterned paper is Basic Grey left over from a page layout I did.The sentiment has been popped up and the flower is from SALT and the pearl Kaiser.Notice the lattice has half the diamond cut out on the patterned paper and half on the cardstock.

Cuttlebug Borders


This border is from the double die which has the lattice from the previous card and this one. I love it when you get 2 as it adds variety. This card has a few features. Firstly the 1st layer of patterned paper is from the Basic Grey paper pack that you buy in bulk. Instead of throwing them out i keep them and make cards. The 2nd layer of paper was made from white paper and painted using the Credit Card Technique and then put through the Cuttlebug horizontally and then vertically. It was lightly sanded( care here as it is thin). Then the top border is the negative part of the die. Pearls are Kaiser.

Tuesday, November 11, 2008

Cuttlebug embossing folder


This one I used the embossing border twice. I put it through on one side and then again to make it look like it is a double border.
One hint here is to make sure you don't turn it around otherwise one side of the border will be raised and the other side will be dinted. I then inked the edges and Kindy Glitzed dots in the centre to match up witht he dots on the outside.
The hearts are Kaiser Stamps and have been popped up.I also used Kaiser pearls on some of the embossed flowers in the background.

Cuttlebug Borders


I have quite a few borders from Cuttlebug. Some are dies that cut out and others are the embossing borders. So I thought I would do some things using the borders.
This one shows the usual embossing folder behind the dragonfly which i drew and made the top one a little smaller than the shape of the dragonfly underneath. I Kindy Glitzed it with purple.The eyes are Kaiser pearls. The embossed cardstock was also inked.
The left hand border is a Cuttlebug die and looks like a lattice. There are so many possibilities for this die:- ribbon can be oven through it, a different coloured background can be placed behind it, Frinkles can be glued in some of the lattice work as well as Kindy Glitz and pearls.

Elissa Rose

In loving memory of my granddaughter Elissa Rose
31-5-31-5-09