Wednesday, October 28, 2009

Curlique Sizzix Plate and Spellbinders Borderabilities


This is the card I made for the Cuttlebugspot challenge of black, green and purple.

We don't celebrate Halloween here in Australia.
You can see the products the I used.
The Borderabilities was a Grand 12" Wisteria Border and the Sizzix embossing plate was Curlique.

Washing


It was wet on Sunday but I had to do some washing. Look who helped me!!! I have these lines you put over the doors and I put the washing on them. Cooper said "I help you" This is his idea of helping me. Pegging the bottoms of the clothes. When i went to iron tonight I found pegs attached to the bottoms of Brian's business shirts. I let out a laugh. These shirts were on the clothes horse outside and Cooper must have put the pegs on when i didn't know. Kids!!!

Coops the cook


Look who helped me make the chocolate cakes. Cooper had a ball helping me make these cakes. I think he ate more than he should have. It doesn't happen very often.

Jessica made cakes with me also at the same age. She licked the knife with no accidents.
I love my grandchildren.

Tuesday, October 27, 2009

10 years today


It is 10
years today that my precious Father left this world and is now in Heaven. Not a day goes by that I don't think of him.

I had the best Father. He was always there for me and never let me down. I was very lucky to have such wonderful caring parents.
This red rose is the rose I bought when he died and is a remembrance of him. These chocolate cakes are for him as he loved cake, especially chocolate cake.
I love you Father.

Sunday, October 25, 2009

Holly and Berries Sizzix Embossing Plates.


Here is the card I made for Unscripted Sketches using a variety of materials and techniques. The products can be seen in the photo.Unscripted Sketches 28

The background page was made using my Cuttlebug and Sizzix Embossing plate Holly and Berries. I used Tim Holtz Applicator to add the Fired Brick ink and then spritzed it with water. When dry I lightly inked with the green.
The red rectangle was made using the Holly Ribbons Cuttlebug Embossing Folder and the Joy was cut and inked from The Cuttlebug Season's Greetings Embossing Folder.
I used the Dabbers to paint up the foam stamp and then stamp it onto white cardstock. I outlined the Holly with green pen and lightly inked it with the green ink.
The eyelets I put in with a Fiskars Eyelet Tool.

I had fun making this card as it had so many techniques.

Saturday, October 24, 2009

Hippies


These Hippiastrums are from my Mother originally. They have multiplied in my garden. I have 3 different colours. The pink one hasn't come out yet.

TRIVIA
We were driving between Nimbun and Byron Bay when I saw a sign "Hippies for sale" I was rather confused at first because this area was Hippie area in the 1970s and 80s. I then realised they were advertising flowers not people for sale. I laughed at myself for this silly thought.

Friday, October 23, 2009

Jessica and Chloe


I took these photos of Jessica and Chloe last weekend. Melanie came to pick Jessica up after Jess had spent the day with me scrapbooking. They loved running around and playing in the school yard. Jessica is always the great big sister. I wish i had a sister like her. One day Chloe will understand how lucky she is.

Some trivia. The dress Jessica has on was once Amanda's. My mother bought it for her when she was 5 or 6. Amanda is now 22. Jessica has a few of Amanda's old dresses that are still in top order. Amanda had so many clothes that some never wore out.

Thursday, October 22, 2009

Winter Borders Scrapbook Page


This is a layout I did based on the Pink Elephant Challenge Blog The Pink Elephant Challenge #37.

Products Used.
SALT coloured cardstock
Green Versa Colour Ink
Tattered Straw Distress Ink
Cuttlebug
Winter Borders Embossing Folders
Dragonfly Letters Stencil
Yellow Pen
Kaisercraft Wooden Stamp
3 embellishments source unknown
Fiskars Border Punch

Wednesday, October 21, 2009

Award from Monica


Look at the award I have just won. As Monica said I love awards. It must be the kid still in me. Monica and I have been friends for a long time. We were first pen pals and now blog pals. I hope Monica will always be in my life both here and for eternity. I value her friendship. I first was introduced to Monica when she was a teacher-so I have been through many of her ups and downs. I have said many a prayer for her . I love Monica's blog full of wonderful Quotes, photos around Sweden of which I have an affiliation as I spent 3 wonderful months there many many years ago-1975-76.
The Honest Scrap Award, with and without Stipulations This is the direct link to Monica's post about the award. I don't have the time to send the award to 7 different people and put their direct links up here at the moment. I have 4 weeks of excess work so will write 10 things about me and leave it at that for the moment. Thanks Monica for not putting up rules I have to follow.
1.I was born in Newcastle Australia and lived there for 30 years.
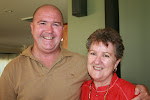
2.I met my husband in Singapore while on a holiday with my parents and daughter.
3.I have been teaching for 34 years. Not many left-am getting tired.
4.I love reading but don't get time to do it at the moment. Love children's books still like Enid Blyton and Anne of Green Gables.
5. Love to sit at my computer of a morning and drink coffee and check my e-mails and blogs.
6. Love Autumn and Spring-the colours the feelings the warmth.
7. Miss my parents every day-they were always a vital part of my life. 10 years this year since my father died and 7 years since my mother died.
8.Love scrapbooking and cardmaking. I especially love making mini albums.
9.Have bought an acre of land to retire to in the Vineyards. Can hardly wait to move up there.
10. Love my Friday nights when Brian and I turn off the TV for the night and we have a special meal prepared by me and a bottle of wine and we chat.
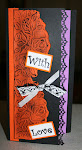
Christmas Card


Christmas is just around the corner so I thought I would use my new Cuttlebug folders for this challenge at Uncripted Unscripted Sketches 27.

PRODUCTS USED
SALT cardstock
Cuttlebug
Winter Trees
Candy Cane Stripe
Circle Punch
White Versa Color Ink
Pinecone Versa Color Ink
Ribbon source unknown.

Monday, October 19, 2009

Cropworks Crop


Last weekend was a crop that I organised and we also raised money for Breast Cancer. Jessica my 6 year old granddaughter came with me and she made a mini album. She also did a drawing with chalks and shaded it. Jessica has a lot of artistic talent.

Glenda picked up Jessica and brought her to the crop as my car was full. I had spent a few nights and a day at Glenda's place and had a lovely time. The crop was a great success and I taught a few of my mini albums.

Friday, October 16, 2009

Flag Card-Pinwheel Card


I haven't made a pinwheel in ages and decided to make one the other day. It can be used on cards and in scrapbooking. It is a versatile and cheap embellishment.

This card was inspired by me when I was creating the concertina mini album for a class am doing on Friday night. I thought " Why don't I make a card the same way?" So I did but with less pages. it is based on the Flag Mini Album.
I have used Bazzill Cardstock and Treehouse Memories Patterned Paper. I had to put a spiral clip on the edge to keep it shut.
This can have photos, verses, messages etc etc inside on the flaps. You can do anything with it as a special gift to a loved one.

Thursday, October 15, 2009

Daisy Border-Spellbindersb


I love Spellbinders for scrapbook pages. I have combined the Spellbinders Grand 12"Daisy Border with the Petite 5 1/2" Daisy Border.

I embossed it on white cardstock from SALT and inked it with Canary Versa Color Inks. The centres of the flowers have been coloured using water colours and the medallions have been popped up using foam tape.
I used The Crafter's Workshop Stencil Casual letters to do the writing and the main cardstock is a textured 12"x12" from SALT.

Wednesday, October 14, 2009

Silicone Coaster Revealed


Here is the coaster I used for the card below. I have inked over the embossed part of the card to make it stand out more.

Keep an eye out for other surfaces that can be embossed and have a pattern. There are heaps out there.

Silcone Coaster


I have embossed this card front with a silicone coaster that I bought the other day as a set.

It is too thick to use all the usual plates.
Sandwich
Plate A, Plate B, silicone coaster, damp cardstock, silicone mat, several layers of shim to suit the thickness of the cardstock and no other mat above. it works fine.
NOTICE the front of the card is a piece of cardstock. On the back I made a folded cardstock piece and adhered with tape to the back of the card front. Easy as------

Tuesday, October 13, 2009

Family Mini Album


I have been making pages for this mini album using mainly the Unscripted Sketches. Here it is so far.

All pages are done on natural chipboard. I have bow in one corner and the other corner at the top is where all the pages are secure. I have secured it with a chain and clip that I purchased from Cropworks.
There are still more pages to come with time. It is a good way to use up those odd bits that are hanging around and also the spare photos.

Monday, October 12, 2009

Mini album -another page of my family-Amanda


I have chosen another page for my mini album for this week's sketch challenge on Unscripted. It is a great sketch and lends itself to cards and scrapbooking. They are quick and easy to do also.
I have done the layout on my daughter Amanda who is the younger of my 2 daughters.

Thursday, October 08, 2009

Kaisercraft Patterned Paper Triangular Medallion

I used the same sized triangles and technique for this as the previous one. The centre is a brad button by K and Co. The patterned paper is by Kaisercraft.

Triangular Fold Medallion.

Before I begin I would like to point out that I already know that I need a new cutting blade for my trimmer. The edges are fury

1. Cut 8 rectangles from 2 different patterned papers. The ones I have done are 7 cm x 3.5 cm and I have used double sided Treehouse Memories Paper.
2. Fold the rectangles as shown in the diagram to form a triangle.
3. Repeat for all rectangles and making sure you have 4 of each colour or pattern.
4. Using double sided tape put 2 small strips of tape to secure the base triangles in the correct place. This is to go on your chosen card background.

5. Line up the points of 2 opposite triangles as shown above. Notice the tape holds them in place.
6. Repeat for all 4 triangles.
7. You will now be working with the other coloured triangles. Slip it in under half of one base triangle and on top of half the other base triangle.
8. Repeat the process with the other 3 triangles until you have your medallion completed. You can fiddle now to get them all in place.
9. Put a large brad in the centre of the medallion and decorate the card any way you like. This is a simple card as i wanted to concentrate on the medallion .
This can be varied in many ways.
1. Use all the same patterned paper.
2. The side that is on the bottom can be cut with decorative scissors.
3. All triangles can be bugged.
4. A button, pearl or punched shape can go in the centre.

Wednesday, October 07, 2009

12"Rose Border

Here is a card I made out of the left overs of the previous card. All the products are the same as the previous one. Except I used the Martha Stewart Border Punch and I bugged the purple with Swiss Dots.

It is good to have left overs because you can make a quick and easy card which is a miniature of the bigger one.

Borderabilities-Rose Border

Here is the card I have made for The Pink Elephant Challenge-The Pink Elephant Challenge #35

The theme is black, orange, purple and white.
This isn't a colour scheme I would usually use but I like them together.
Products Used
SALT black, purple, white and orange cardstock
Kaisercraft wooden stamp
Black Versa Color Ink
Fiskars Border Punch
Spellbinders Borderabilities-12" Rose Border
Cuttlebug
The sandwich I used for the Rose Border was 12"Border Plate from Spellbinders, magnetic strip with metal Rose Border attached and facing upwards, Dampened cardstock,!" Spellbinders Silicone mat, 12" Spellbinders Plate, 3 strips of cardboard from the long lengths of the spines of a cereal box ( these are just made for these borders. LOL.)

Breast Cancer Fundraiser Crop 16-17th October

The Crop at Beaumont Hills Primary School on the 16-17th October will have activities to raise money for Breast Cancer. Breast Cancer is in my family and I have just made an appointment to have a yearly mammogram. It is important to support this very worthwhile cause because 1 in 11 women will develop breast cancer before the age of 75.

If you would like to come to this crop either on the Friday all day or the Friday night or the all day Saturday Crop or a combination of several then please e-mail me - roseannemon@yahoo.com to secure a place.

$15 for each session but a combination of sessions is $25.

Friday Lunch is bring a plate and we will share.

Saturday Lunch is also bring a plate and we will share.

All morning, afternoon teas, supper and tea and coffee will be provided by me.

There will be a scrapbooking lesson on each occasion, a card design and a technique for each session. All sessions will have different lessons.

A gold coin donation will be required if you don't have something pink on your body.

There will also be some fun activities to join in if you want to.

Please come and bring a friend and support this worthwhile cause.

10% of all sales this weekend will go to Breast Cancer Awareness.

Tuesday, October 06, 2009

Long Weekend away


The October long weekend was spent at Milbrodale with the 4x4 Club we are in. Sunday night was a special dinner and presentations for all the activities that went on all weekend. I was in charge of the kids activities. Sunday night was also dress up night. We had to go as the opposite sex. We also took our granddaughter Jessica with us. She had a ball. She went as Harry Potter.

Our friends Glenda and Bruce also went.

Elissa Rose

In loving memory of my granddaughter Elissa Rose
31-5-31-5-09