Monday, November 05, 2012

Sizzix Reindeer

Pop up Reindeer card. The sentiment was written in word and printed and the paper is Kaisercraft. The cardstock is from SALT.

Close up of the embossed reindeer.

Reindeer pop up card shut. This shows the new Peppermint  Twist paper from Kaisercraft and the bling on the front of the card.

I love the new Sizzix die and embossing folder of the reindeer. It is so easy to use and looks great. 
The sandwich I used in the Cuttlebug for the die was the B plate, cardstock/chipboard, Sizzix die, B plate. I ran this combination through the BUG and it cut perfectly. I then embossed it with the normal sandwich.

Sunday, November 04, 2012

Chloe turns 5

Chloe and Cooper at the party.

This is the clown puppet that Cooper made at Chloe's birthday yesterday.


Triangle Fold Card

I have used an old Kaisercraft Christmas Paper called Dear Santa Collection. I used 3 different ones called Train Set, Billy Cart and Pony.

I used Spellbinders Classic Scallop Circles and my Cuttlebug to do the circles.

Opened up showing all the papers used. The pearls are Kaisercraft pearls.

This card was so much fun to do. I should have thought before I glued with Gel Medium because the inside wish is upside down when you open the card when the sentiment on the front is facing the correct way when reading it. Live and learn.

I have no idea where I got this idea from but it is on the net somewhere. Google Triangle Fold Card and you will find all sorts of links to other blogs and even You Tube that will show you how to make them. I found these after I had made my triangles and folded the card.

Friday, November 02, 2012

Christmas Card

Who said you have to have red and or green for a Christmas card? This is another folded Christmas card in brown, green and white. 

Saturday, October 27, 2012

Granddaughters

Jessica and Chloe at Crestwood Park

Jessica and I

Jessica, Chloe and I.

I love my 2 granddaughters. This outfit that Jessica has on is what I bought for her last weekend. I took the 2 girls shopping and they bout 3 items each. It was so much fun.

Kaisercraft Folded Card

A double fold at the bottom showing the underneath paper.

Showing the template made to cut out the red cardstock.

Friday, October 26, 2012

Kaisercraft Folded Card

Fold any size card you wish to make and adhere patterned paper to the front.

Chose which corner you want to turn over to make a triangle.

Make templates 1cm smaller than the underneath triangle and cut the cardstock and paper the relevant size.  
Adhere the triangles tot he folded triangle.

Christmas wishes to chose from that have been printed from the computer.

Adhere the sentiment, attach the Kaisercraft bling and you have a card.

HINT
The bow of bling was cut away from a Kaisercraft bling present.

Thursday, October 25, 2012

Cooper's Assembly

Cooper sitting in line at the beginning. Everybody else was facing the stage but not our Cooper.

Cooper proudly displaying his white merit award that required 3 green awards to achieve. He is very proud of his achievements.

Cooper's class ran the assembly yesterday and the class also sang Yellow Submarine. He was so expressive and really got into the song. I had to smile. He also used the microphone to thank everybody for coming. What a great effort the year 1s did.

Kaisercraft Folded Card

Most of the products used here are Kaisercraft. The paper is from an old range. 

Close up of where to put the Kaisercraft bling and the handmade flower.
The cards I am making at the moment uses scraps. This is a great way to get through your "stash of scraps" and make creative cards for Christmas and in fact any occasion. Happy creating.

Wednesday, October 24, 2012

Twig and Berry Folded Card

This card was mainly made using Twig and Berry paper from Kaisercraft. The bling was also from Kaisercraft.

Close up showing the title that was printed from a word document I did on the computer because my stamps are somewhere safe and I have no idea where they are in this house because we have just moved.

HINT
The bling is from a Kaisercraft Christmas bling shape. I used part of it on another card and then I cut up the strips and stuck them on this card and I also cut away single bits of bling from the same shape.

Tuesday, October 23, 2012

Holiday Layout


This layout was done to show people you can use patterned paper as the background. Also a different way of doing the title, with Heidi Swapp invisible stickers. You can ink them any colour you want to match the layout. I inked these black then rubbed them back with a soft cloth to expose the spots that acted as a resist to the ink.

Sunday, October 21, 2012

Triangular Fold Card


The construction of the card 

The finished card

Inside the card

Method
1. Cut cardstock 15cm across and 24 cm down.
2. Score 12cm down the 24cm edge and fold in half.
3. Mark with a pencil 7.5 cm at the bottom of the front flap.
4. Fold the corners up to form a triangle.
5.  Cut a rectangular piece of patterned paper to adhere to the top.
6. Cut 2 triangular pieces of patterned paper slightly smaller than the triangles formed.
7. Adhere the triangles shut and put a bow over the join.
8. Punch leaves and either make flowers or use premade ones to  add to the top of the card.
9. Adhere patterned paper on the underneath part of the card.
10. Add a sentiment

I saw this card on the net with no instructions and I have no idea where I saw it. I made up the instructions and dimensions myself. Inspired by a talented lady whom I thank.

Saturday, October 20, 2012

year 12 -2012

I gave year 12 a party and presentation.

The present year 12 gave me.
It is always hard to say goodbye to a class of students that you have enjoyed teaching over the years. Some students I have taught for 4 years and had them as a year 7 student. You see them grow and mature and then go out into the real world.  All you hope is that they are happy and successful.

Friday, October 19, 2012

Double Dutch Card


I saw this card shape on images when I googled fun fold cards and decided to make one myself. I made the card to my own dimensions in metric measurements. I have no idea who was the original person who designed it and if it was you thank you for the great idea. 
Method
1. Cut the mauve cardstock 12cm x 23cm. See first photo.
2. Score 8.5cm down and across the card . See first photo.
3. Cut the bottom strip 24cm x 6cm. See first photo.
4. Score the strip at 6cm and 18cm  across and down the strip. See first photo.
5. Adhere the folded strip to the bottom of the card. See second photo.
6. Cut a square of 6cm in the mauve cardstock for the flap to keep the flaps shut. This can also be a shape of any kind to add variety to the card.
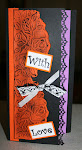
7. Decorate the card with patterned paper, sentiments, embellishments etc.
8. The inside can be decorated with a verse, stamps etc.


Thursday, October 18, 2012

60th Birthday

This is my precious family taken at Berowra Waters on my birthday. I chose to have my birthday with family here and we had a picnic. It was a beautiful sunny day and I enjoyed myself. 

Cropworks Camp

The group of ladies who attended the camp.

Melanie and Rose-Anne the camp hosts.

This year the camp theme was blue and the best decorated hat. Blue because we sold raffle tickets for Beyond Blue. 
As always we all had a fabulous time and accomplished lots of work. Melanie did most of the cooking and I did most of the organising and lessons.

Sunday, August 12, 2012

Father's Day Card

This is a simple Father's Day card I wizzed up the other night. The DAD is white chipboard from Cropworks and the white cardstock is also from Cropworks. Both these products are from SALT. The patterned paper was a masculine one and I didn't have a stamp so I wrote the message and printed it out from the computer.
I don't have a father alive nor a father-in-law so I will put this card in my folder to show as a demonstration.

Wednesday, August 08, 2012

Scor- Pal


I used the Scor-pal to get the exact sizes for the small photos around the edge of the cardstock. I managed to get 13 photos on one page and it highlighted the day with photos from many activities.

Saturday, July 21, 2012

Triptych Card


"A triptych (play /ˈtrɪptɪk/ trip-tik; (from the Greek adjective τρίπτυχοs ("three-fold"), from tri-= "three" + ptysso= "to fold") is a work of art (usually a panel painting) which is divided into three sections, or three carved panels which are hinged together and can be folded shut or displayed open. It is therefore a type of polyptych, the term for all multi-panel works. The middle panel is typically the largest and it is flanked by two smaller related works, although there are triptychs of equal-sized panels. The form can also be used for pendant jewelry."
This definition is from Wikipedia and it also applies to cardmaking.
If you type Triptych Cards into google images you will find all sorts of shapes and sizes. They are fun to make.

Friday, July 20, 2012

Self Portraits

A self portrait of me using my new iPhone and iPhotos to alter. 
Another version of my self portrait 

An iPhoto alteration of my self portrait

I have a new iPhone and was playing with it the other day. I wasn't happy with the self portraits but when I played with them in iPhoto I was . These were taken in the mirror of my en-suit.

Elissa Rose

In loving memory of my granddaughter Elissa Rose
31-5-31-5-09