Saturday, April 09, 2011

Easter Cards


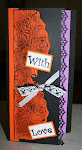
This card was done using Bazzill embossed cardstock. The white eggs were cut out from the cardstock and inked. Where the gloss area is the ink will rub off and where the Bazzill Cardstock is the ink will stay. So I inked the white Bazzill Embossed egg cardstock to match in with the mauve Bazzill embossed cardstock. Some Kindy Glitz and a sentiment types out from the computer and you have a card.

Friday, April 08, 2011

Double layered Lace Flower


These flowers have been made using a double layer of lace. The brown is a strip of lace fabric cut and the cream is a bought pre-made lace. I just ran a running stitch along the edge and gathered it up and then sewed a fancy button in the middle.

Easter Hat Making

Cooper colouring in the eggs for the hat.

Cooper cutting out the eggs.

The finished Easter Hat.

Cooper posing with his Easter Hat and dirty face.

Thursday, April 07, 2011

Cooper's Easter Hat Parade


Cooper coloured the eggs and cut them out and stuck all the stickers on his hat for the parade. I missed it because I had to work. I made the gold hat.

Tuesday, April 05, 2011

Selvedged Flowers

I love using the selvedge to make flowers because it has character. This selvedge is from a piece of brown pan velvet. I will use the velvet to make other flowers but I cut off the selvedge to use for this flower. Once the selvedge has been cut off I run a running stitch down the edge that will not be seen. I pull it tight and fasten it off.
I have used a Kaisercraft pearl brad in the centre of this flower and I can attach it to cardstock.

Monday, April 04, 2011

Lace Flowers


Here is the link on this blog to the flowers I made in Calico doing the same method. I didn't use Glimmer Mist but Tim Holtz Colour Wash. Calico Flower
Experiment and see what you come up with. Different fabrics and different stains with give different results.

Lace Flowers

I made these flowers using lace, Gel Medium, Glimmer Mist, Kaisercraft pearl brads and SALT pearl brads.
Method.
1. Free hand cut different sizes of lace.
2. Rub Gel Medium all over the front and back of the lace.
3. Scrunch up very tightly and leave to semi dry.
4. Pull the circle apart but try and leave scrunches in them.
5. Assemble as many layers as you wish.
6. Spray with Glimmer Mist.
7. When the Mist is dry attach a brad or any other centre you desire.

Friday, April 01, 2011

Easter Card

This 3D Easter Card was made with some help from the computer. I printed the Happy Easter from the computer because I didn't have a stamp with the sentiments. The eggs have come from Google Images. I typed in Easter Eggs. Who needs stamps when you can get images from the net? We all do. LOL.

Side view showing the 3D appearance.


Template of the top piece. I have not shown any measurements because you can make up your own depending on the size you want. The cut out insert can be any shape depending on the occasion. This one I used an Easter Egg shape to cut out. I have done others with square, rectangles, circles. There is nothing stopping you from using a heart or Christmas tree or even flower as the shape. This has made me want to create some more.
To send it or the give it in an envelope you ask? Make a 3D envelope. I will do a tutorial on that.

Thursday, March 31, 2011

Mixed Media-Crackle Background-4

I have used Kaisercraft paints for this one. Kaisercraft paints are more runny and this gives a great texture for this method.

Wednesday, March 30, 2011

Mixed Media-Crackle Background-3.


These ones have been done with Jo Sonja paint. I have had it for a while and they have done rather thick. Hence, the crackles do not crack as much as the more runny paints. I still like the effects and they are different.
Keep looking for ideas i have done using these backgrounds. I haven't had a lot of time of late and have not been able to play as much as I like.

Monday, March 28, 2011

Mixed Media-Crackle Background-2.

This has been done the same way as the previous method and with the same types of paints. However, when I put the PVA glue and the yellow over the dry black I did it in a circular brush stroke pattern. Hence the different look.

Sunday, March 27, 2011

Rainbow

This is the rainbow over my suburb on Friday night. The dark clouds accumulated and a few drops of rain fell and then came this rainbow. What a spectacular sight. 

Mixed Media-Crackle Background.

The final background to play with. 
Paint the cardstock in a colour of your choice. Allow to dry. 

Put a coat of PVA glue over the dry red paint.

Quickly add another colour while the PVA glue is wet.

Work the top colour all over and some mixing with the PVA will also occur. Allow to dry or watch and wait for the cracks and patterns to appear. it might take a while but it will be rather exciting.

The products used.

The cracks that appear will also depend upon the type of paint used. This is a child's poster paint (my grandson's)and is rather runny. It is water based.
I have also used other thicknesses of paint that I will share with you as time goes along.

Saturday, March 26, 2011

Sew-Easy Tool


This is page 2 of a previous layout.

Thursday, March 24, 2011

Freehanding on Layouts

Layout for Lesson Check out Cropworks for more photos of this layout. I love these Water Distressed Flowers. I also like playing with paper. I made the vines and leaves myself and drew them freehand, then cut them out and inked them. I also drew all hearts on this page by freehand. I like freehand accents as it is part of your creation. I draw the hearts on the back of the patterned paper and cardstock and cut them out. I trim up any line I am not happy with. I overlap the hearts on the page so parts are cut off so it looks like they are not just plonked on the page. 

Wednesday, March 23, 2011

Sew-easy Tool and Stamped Flowers

I used the scalloped holes for this layout and put some Kaisercraft pearls on the scallops.
Notice the pleated patterned Chatterbox paper.

The leaves have been stamped and inked around the edges. The flowers have also been stamped with a Kaisercradt pearl in the centre. Notice the flowers and leaves have been rolled a little to give dimension. The fabric flower has been made from 5 circles, one for the base and the other 4 have been folded into quarters and all have been sewn into place. The brad is a SALT brad.
This stamped flower has been layered and the petals have been turned up a little along the edges.

Tuesday, March 22, 2011

sew-easy Tool and Water Distressed Flower


Check out the instructions and the whole layout on my Cropworks Blog. Here is the link Sew-easy Tool and Water Distressed Flower.

Monday, March 21, 2011

Sew-Easy Tool and Water Distressed Flower

 Checkout Cropworks blog for instructions and more photos of this layout.  Easy-Sew Tool Layout

Sunday, March 20, 2011

Envelope and Card


This works best with double sided patterned paper. It is also a great way to use up all your old papers that you no longer want.

Saturday, March 19, 2011

Cuttlebug Heart Card


This card has been made by using SALT cardstock and the card and heart have been bugged in the opposite ways. One raised and one indented. The heart was drawn freehand and cut out . I like to draw freehand hearts.
The flower is in my tutorial and is the water distressed flower. I used SALT cardstock.
the wooden stamp is Kaisercraft and the brad is SALT. I used Chrystallina Kindy Glitz on the flower and Fire Red Distress Ink on the flower.

Friday, March 18, 2011

Sew-Easy Tool

This layout shows Melanie, Chloe and I 3 years ago. The Basic Grey patterned paper Infusion goes well with my red top, Mel's green one and Chloe's pink outfit. It was almost like it was made for photos.
A close up shows the stems I sewed using my We are Memory Keepers tool, Sew-Easy. I love it. These flowers I made using the Water Distressed method that I did a tutorial on my blog Water Paint Distressed Flowers.
Also check out Cropworks Blog to see more photos of the above layout and the method I used to make the flower stems. Sew-Easy Tool

Friday, March 11, 2011

Jessica's Pony Party

Jessica, Chloe and I. 
I was way off in pinning the tail on the pony.
This is the Pony Cake that Melanie made and decorated. She is so cleaver.

Thursday, March 10, 2011

Pipe-cleaner Flowers

Here goes my flower making again but this time with pipe-cleaners.  I have put a Kaisercraft gem in the centre to act as the centre of the flower. They are easy to make.
Turn the whole length of the pipe cleaner into waves and join the end with the beginning by wrapping the wire part of the pipe cleaner around each other. Then fiddle to get the pipe cleaner into shape with the petals.
I have used double sided tape to adhere the flower onto the paper.

Elissa Rose

In loving memory of my granddaughter Elissa Rose
31-5-31-5-09