Friday, July 30, 2010

Stamped Cuttlebug Folders


The foam block that was used to make an impression of an embossing folder and then stamped.
This foam block is heated and then immediately pressed into the embossed folder. The ink is rubbed over the block and then stamped.
I cut the flower out and popped it up with foam tape.
To get rid of the ink wash the block and to get rid of the embossed shape reheat the block and the indentation will disappear.

Thursday, July 29, 2010

Painted Backgrounds with the Cuttlebug-Card5

2 Martha Stewart edge punches were used to make this border.
The lacework was punched from cardstock that was painted using the Cuttlebug and Kaisercraft paint.

Wednesday, July 28, 2010

Painted Backgrounds with the Cuttlebug-Card4

A close up of the Painted Background.
This lacework was made using the painted background technique and Martha Stewart Punch.
The lacework and square were made using the painted backgrounds technique on the cuttlebug.

Tuesday, July 27, 2010

painted Backgrounds with the Cuttlebug-Card3

Kaisercraft Paint and Tim Holtz Distress Ink.
Notice the mottled appearance on the background. This is a result of spreading the paint.
This background was made using 3 dabs of paint in random positions. I used the folder after the paint had dried.

Monday, July 26, 2010

Painted Backgrounds with the Cuttlebug-Card2

Notice the paint has a mottled appearance in some areas. This adds further interest to the background.
Using Scrollwork as the textured frame for this card.
I did the background a little differently in this one. I run the paint from the tube down the cardstock. The 3 colours along side of each other. Then put the other piece of cardstock on top and ran it through the Cuttlebug.
I made the flower by punching 4 circles and scrunching it. The stem and leaves have also been made from the painted background cardstock. I drew them on the wrong side of the card and cut out.
I also sanded the background.

Sunday, July 25, 2010

Libby and I teaching

Libby and I teaching a flower class.
Me using a distresser.
Libby and I .
Me in my purple outfit.
Here are some photos of Libby and I teaching a flower making class at a recent camp we went to.

Painted Backgrounds with the Cuttlebug-2

Using Kaisercraft Paint. The top were made using the Cuttlebug to spread the paint. The bottom 2 were made using a hand to spread the paint. Notice the paint spreads more with the Cuttlebug
Close up of the painted background using Kaisercraft Paint and the Cuttlebug.
Close up of the painted background using your hand.
Here are some comparisons of the backgrounds using crackle paint and ordinary paint and also a comparison using the Cuttlebug as opposed to using your hand. The Cuttlebug allows the paint to run further.

Saturday, July 24, 2010

Painted Backgrounds with the Cuttlebug-Card1

The card was made with Tim Holtz Crackle Paint, Distress Ink and Martha Stewart lace punch.
The close up shows the cracks that form when the paint has dried.
Here is a card I made using the cardstock from the painted background I ran through the Cuttlebug. I like using Crackle Paint as it shows up the cracks.

Painted Backgrounds with the Cuttlebug

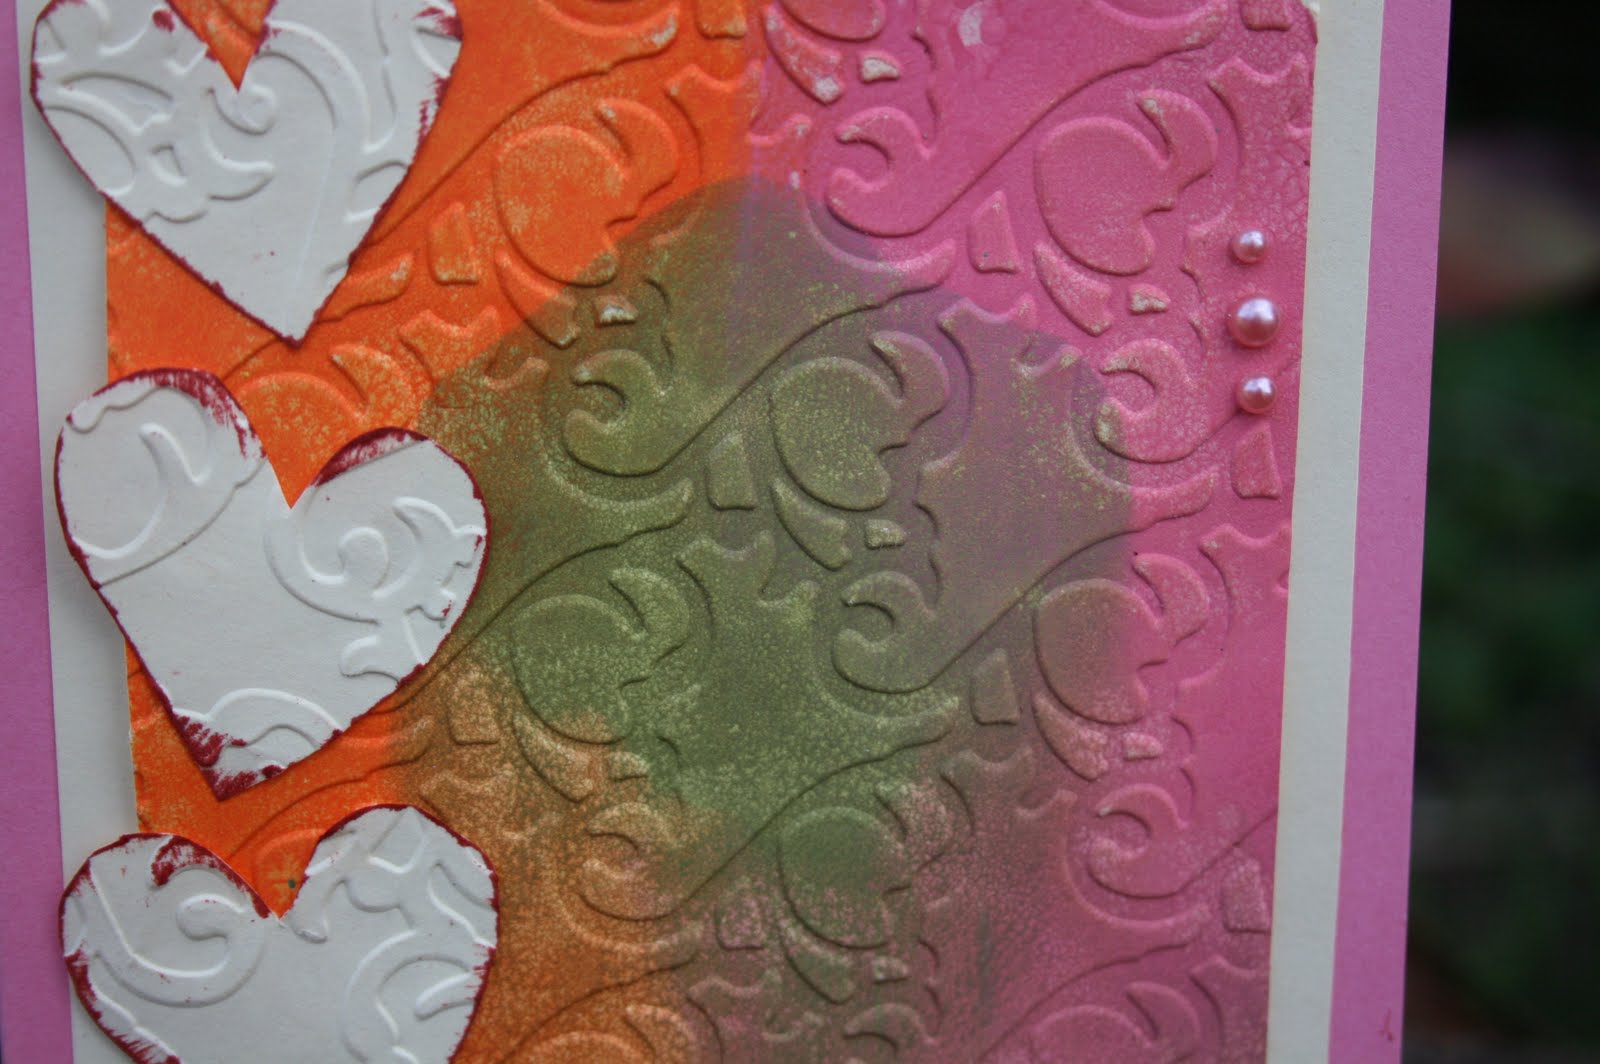
Tim Holtz Distress paint that has been run through the Cuttlebug. Notice the cracks.
You can even punch out a lace border using Martha Stewart punches from the painted backgrounds.
I have been trying to think of something I could do with the Cuttlebug that I had not done before and I came up with this technique. Painted Backgrounds.
METHOD
1. Put a few blobs of Crackle paint/paint on a piece of cardstock.
2. Put the same size cardstock over the paint.
3. Run it through the Cuttlebug.
4. Allow to dry and use it any way you wish.
The thicker the paint like Crackle Paint the less the paint will run. However, normal paint is more runny and will run further and will often run out onto the B plates. Don't worry as the paint will wash off.
TIP
If using thicker paint make sure you separate the 2 pieces of cardstock immediately after you have run it through the Cuttlebug otherwise they will stick together.

Sunday, July 11, 2010

Mixed Media

I used a paint brush to apply a thick layer over the objects to be stamped. Make sure you wash everything immediately after you have used them as the mediums are easier to get off when wet

Stamping with a Cuttlebug folder.
Inked with Tim Holtz Distress Inks over Texture Paste and a stamped Cuttlebug folder image.
Inked with Tim Holtz Distress Inks over a stamp stamped image.

I love texture and what better way to add texture than texture paste and Gesso. I used both these products with stamps and a Cuttlebug embossing folder. The texture paste is just a wee bit thicker than the Gesso but they both give the same effect.
I put a thick layer on a stamp and a Cuttlebug Folder and just stamped them on paper and then again and again without reapplying any medium. Obviously the image became thinner and thinner.
I let the stamped images dry for a period of time and then rubbed ink over the top. This brings out the design more.
Keep a look out to see what I create with these.

Saturday, July 10, 2010

My Grandchildren


Melanie, Jessica and Chloe came over and spent a few days with me. It was so nice having them.

This photo was taken of the children while they were having breakfast in front of the TV. They had a ball together.

Chloe

The hat Chloe is wearing was one I knitted recently. The frill around the bottom was crocheted. Chloe loves this hat.

The skirt is a circular skirt that I drafted the pattern yesterday for her and almost had it made when she grabbed it and put it on and was twirling around the family room in it. She loved it. However, Chloe is being toilet trained and wet the skirt when she didn't make it to the toilet in time. I saw the funny side and now have to wash it before I finish it. I have to do the hem and sew some flowers on the bottom. At least i know she loves it.

Cutting Mats for Cuttlebugs


These are the plates that I use with the Cuttlebug when cutting. By using these that are inexpensive, I save the wear on my more expensive B plates. These cutting mats can be bought from most stores that sell stationary etc.

Friday, July 09, 2010

Tim Holtz Alterations

Here is another card I cut using Tim Holtz Alterations on the Cuttlebug. I also used a sheet from the Basic Grey Pack.

Thursday, July 08, 2010

Embossing -Experimentally


Just a thought the other day after thinking of my serviette embossing over Cuttlebugged cardstock.

I glued a chipboard shape to cardstock.
I then glued using Gel Medium some paper over the top and smoothed it out so there were no creases.
I inked the whole piece and then sanded it.
I have a few more ideas with this.
I have to remember to put the photos in reverse order on here. I keep on forgetting.

Wendy's CJ pages


Here are the pages that Wendy made for me about flowers. They are so pretty. I love the quotes.

Wednesday, July 07, 2010

Tim Holtz Alterations


As I said in a previous post, the die comes with 2 designs. This card shows the 2 designs that are featured on Tim's Alterations, On the Edge, Ornate.

I have used Basic Grey Patterned Paper advertising sheet from a paper pack for this card.

Martha Stewart Inspired Flower

These are the instructions for the flower that featured in the card below. I got the idea from a Martha Stewart Project Sheet that made these as a Star. I have used less squares to make this flower.

INSTRUCTIONS
1.Cut out a circle and fold into 4. Undo and use the creases as the first places to glue the petals. Then the next 4 petals will be glued in between the first 4. The creases help to space the petals evenly.
2. The petals are made from squares that are shaped like a cone and glued in place. The size of the squares depends on the size of the flower you want to create. I have used double sided paper for these petals and reversed every second one.
3. A button, Kaisercraft pearl, punched circle etc can be placed in the centre.

Tim Holtz Alterations and Flower Combo


Tim Holtz has dies that go through the Sizzix but I put them through my Cuttlebug and they work fine. The edge of the card was cut with Tim Holtz, Alterations, On the Edge, Ornate. They come as 2 designs. This card has used only one.

The sandwich for the Cuttlebug.
Plate B
cardstock/paper
Tim Holtz Alterations Die
Plate B
These Alterations are fantastic. I will be doing various cards etc in the next few posts.

Tuesday, July 06, 2010

Vietnam and Singapore

Me eating in the open restaurants in Singapore. The beer was so refreshing in the heat. The food was so nice and cheap. So many restaurants to choose from. All haggling for sales.

Me in Hanoi-Vietnam. We walked around the lake and found this entrance.
Me in Hanoi. This is the bell in the grounds of a temple.

Easel Card


Here is a RAK that Carol J from New Zealand sent to me. It is so nice and I love it. It made me feel special and some days we all need to be made feel special. Thank you Carol for always being kind and thoughtful. I love cupcakes and I love the Easel Shape card.

Monday, July 05, 2010

Me in Vietnam

Me on the boat sailing around Ha Long Bay in North Vietnam.
Me in Malacca in Malaysia. These were highly decorated in the town.

Carol J's Circle Journal Swap


This is the Circle Journal swap I received from Carol J in New Zealand. My theme is flowers. I love what carol did with these pages.

Sunday, July 04, 2010

Me in Vietnam


Here are some more photos of me in Vietnam. These were taken in Hanoi. You can tell it is hot by my face. It was 96% humidity while we were there. I had a great holiday.

Elissa Rose

In loving memory of my granddaughter Elissa Rose
31-5-31-5-09